Installing insulation the right way is key to keeping your home energy-efficient and free from moisture problems. One of the biggest mistakes homeowners make is facing the insulation the wrong way. This can trap moisture, cause mold, and reduce insulation performance.
The rule is simple: the paper or foil facing should always point toward the heated or cooled living space. This helps control moisture and keeps your insulation working properly.
In this guide, we’ll explain how to install faced insulation correctly, why it matters, and how to avoid costly mistakes.
In this guide, we’ll break down the right way to install faced insulation, explain why it matters, and help you avoid common installation mistakes that could lead to costly repairs.
Types of Products
The two main types of insulation that use facing are:
Made from spun glass fibers with a paper or foil facing. The facing acts as a moisture barrier.
Made from natural materials like basalt or slag, also featuring a paper or foil facing for moisture protection.
Both types come in faced and unfaced versions. Unfaced insulation is best for interior walls, while faced insulation is ideal for exterior walls, attics, and crawl spaces where moisture control is important.
Which Way to Install the Facing?

The facing should always be positioned toward the heated or air-conditioned space. Here’s how to install it properly in different areas:
- Exterior walls: Facing should be against the drywall.
- Attics: Facing should point down toward the ceiling below.
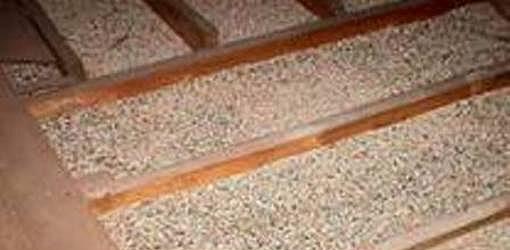
- Floors above unconditioned spaces (like crawl spaces): Facing should point up toward the subfloor above.
Why does this matter? If the facing is installed incorrectly, moisture can become trapped, leading to mold growth, rotting wood, and reduced insulation performance. Since insulation’s effectiveness is measured by R-value, incorrect installation can lower your home’s energy efficiency.
Vapor Barriers: Do You Need an Extra One?
The facing on insulation already acts as a built-in vapor barrier, but in some cases, adding an extra one makes sense.
- In cold climates, vapor barriers should be installed on the warm side of the insulation to keep humid indoor air from reaching cold surfaces.
- In hot, humid climates, vapor barriers go on the exterior side to prevent outdoor humidity from seeping in.
Even if your insulation is properly faced, adding a separate vapor barrier can provide extra moisture protection in high-risk areas like basements and crawl spaces. Options include:
- 4–6 mil plastic sheeting
- Kraft-faced fiberglass batts
- Smart vapor retarder paint
- Vapor barrier primer
So, Is Proper Facing Direction That Important?
Yes! Installing insulation with the wrong facing direction can lead to serious problems, including moisture buildup, mold, wood rot, and reduced insulation efficiency. Taking the time to install insulation correctly preserves your home’s energy efficiency and prevents costly repairs down the line.
Bottom line: Don’t cut corners—proper installation is well worth the effort!
FAQs About Facing Insulation
Yes, in most cases. Stapling the facing helps keep the insulation secure and prevents sagging over time. Use narrow crown staples every 6 to 8 inches along the edges. If your insulation has flanges (paper tabs), staple them inside the framing for a tight seal. For basement or crawl space installations, check local building codes, as some areas require a separate vapor barrier.
Yes. Compressing insulation lowers its R-value, meaning it won’t insulate as effectively. Insulation works by trapping air, so squeezing it too tightly reduces its ability to slow heat transfer. If the insulation doesn’t fit properly, trim it to size rather than forcing it into place.
Only if installed incorrectly. The facing should always point toward the heated or cooled space to prevent moisture buildup. If installed backward, it can trap moisture, leading to mold growth, wood rot, and insulation failure.
In most cases, no—the insulation’s facing already acts as a built-in vapor barrier. However, in high-moisture areas like basements or crawl spaces, adding a separate plastic vapor barrier (such as 4-6 mil polyethylene sheeting) can provide extra protection. Always check local building codes, as some regions have specific moisture control requirements.
If you catch the mistake early, flip the insulation before sealing the wall. If the wall is already closed up, you may need to remove and reinstall it properly. Ignoring incorrect installation can lead to trapped moisture, mold issues, wood rot, and reduced insulation performance over time.